Howdy!
Today I am going to write about how to implement custom Camera using AVFoundation.
Here I have created this storyboard consisting of two View Controllers. One is Main View Controller and attached to Navigation Controller and the other one is Camera View Controller in which I have a UIView (in gray color), a Button which will help us capture the image/video, an Activity Indicator which will show processing, and a Bar Button for switching camera.

In my assets I have.

Now lets open your Main View Controller and create IBActions for both of your buttons and set the identifier of its segue to Camera View Controller as ‘capture’ (you can give it any identifier you like). Also create a variable of type String called keyForCamera.
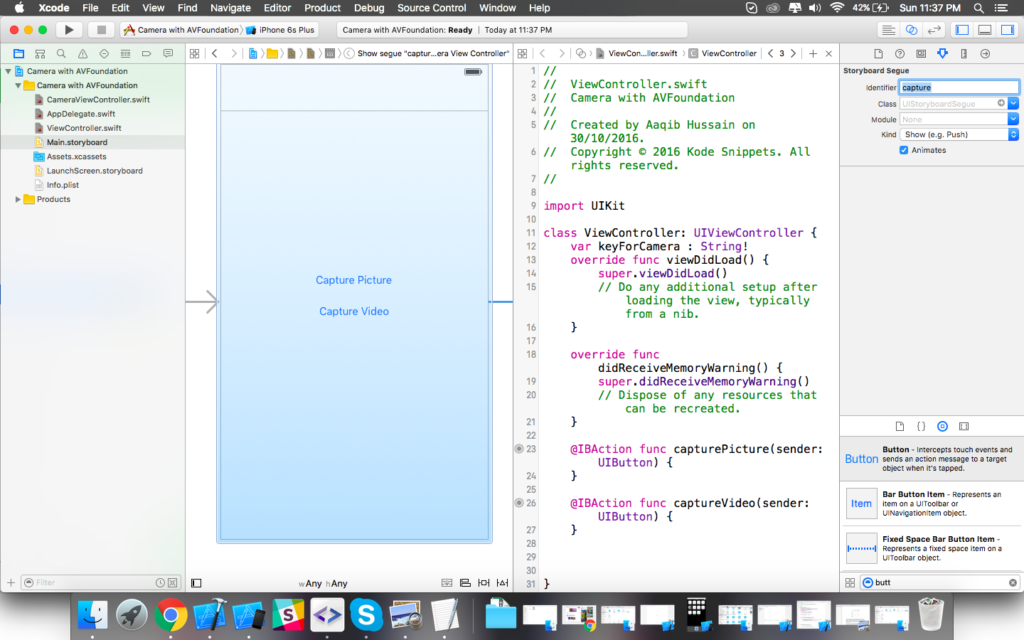
Open your Camera View Controller now and create IBActions and IBOutlets, two functions for initiating Camera for Image and Video respectively and a variable named keyFromMenu of type String.

Create @IBOutlet for the UIView , Activity Indicator and @IBAction for the Capture Button and Switch Camera Bar Button.

Now come back to your Main View Controller and in your @IBActions paste the following code and override prepareForSegue.
Just to check if our logic works build and run it, it should show you different titles on both of the buttons you created.

Now come back to your Camera View Controller class and declare the following variables in it.
Your initiatePictureCamera function will now look like this.
And your initiateVideoCamera will be something like
In your Capture button action
This will show you an alert when image is saved in the Photos.
Conform your class Camera View Controller to protocol AVCaptureFileOutputRecordingDelegate. It will provide the recorded video url which can be later saved into Photos, and paste the following code in your class.
Finally for saving Video in Photos.
Don’t forget to add the these frameworks in your Camera View Controller.
At last, run at test it.
Check out this demo.
Here is the full Source Code to this project.
Good day!

4 Comments