
I finally bought an Amazon Fire and decided that I should make a tutorial for enabling its USB debugging mode for android development purpose. So here it is. Pretty simple and easy.
Let’s begin!
Open your Settings.

Then select Device.

Then select Get info about your Fire, and tap any of the item at least 7 times within 5 seconds. Developer Options button will appear.

Press the button Developer Options and set Developer Options to ON. Also check USB Debugging under Debugging.

After that being done. Now open your SDK Manager. Click Tools -> Manage Add-on Sites.

Then click on User Defined Sites. Then click on New.
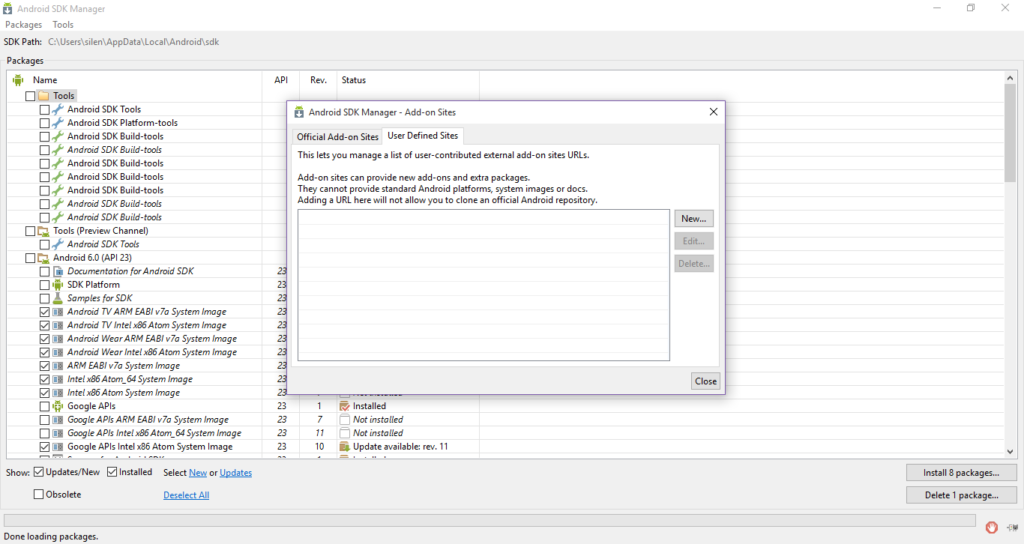
Paste the following link and then press Ok and then Close.

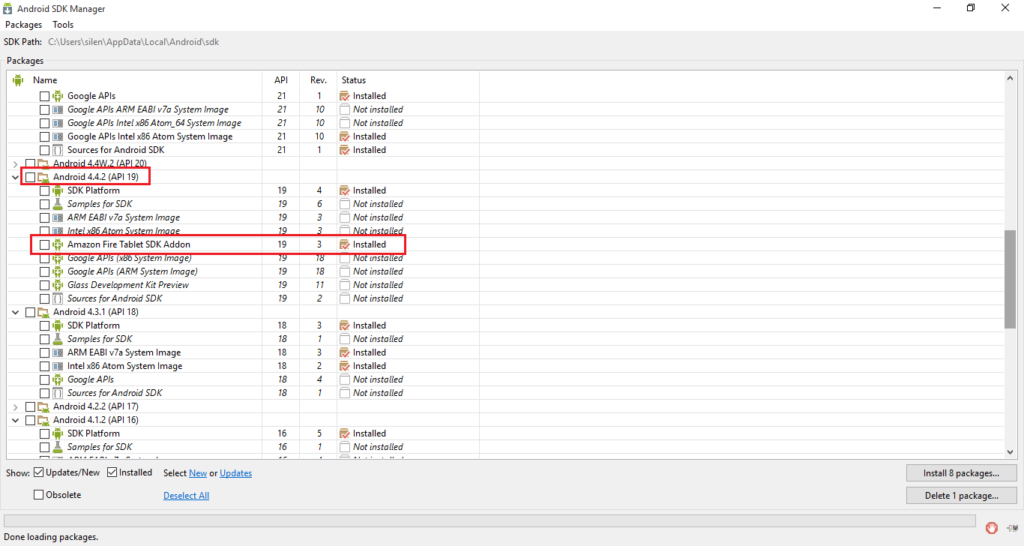
When its finished loading. Navigate to Android 4.4.2 (API 19) / Android 4.2.2 (API 17) and select Amazon Fire Tablet SDK Addon / Amazon Fire Phone SDK Addon and install it.
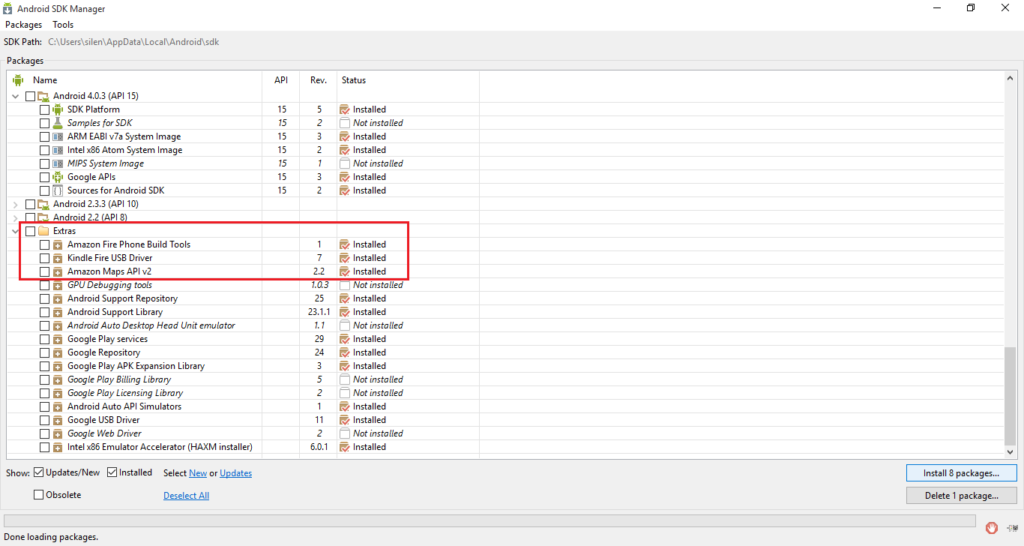
Scroll down and go to Extras. Select Amazon Fire Phone Build Tools and Kindle Fire USB Driver and install them too.
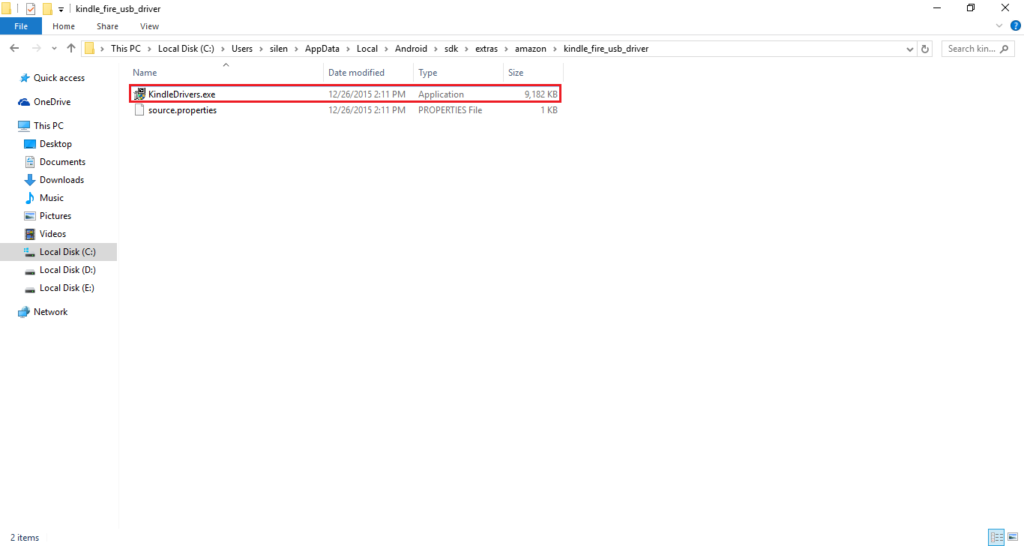
At last open your File Explorer and navigate to the directory where Android SDK is installed. Open extras -> amazon -> kindle_fire_usb_driver. Install KindleDrivers.exe file.
Finally open Android Studio and connect your Amazon Fire. You’ll get the following prompt, press OK.

Now on Android Studio, run your app, and you’ll see your Amazon Fire in the connected running device.
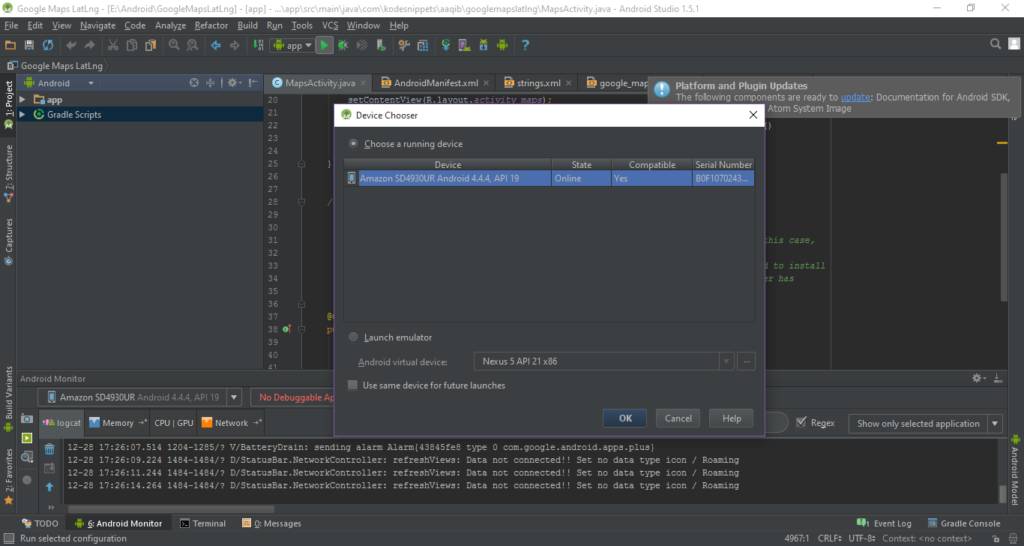
and that’s all to it.
If you guys have any question leave a comment.
See ya!





2 Comments