
You must have seen sponsored ad of Back4App on facebook (that’s how I get to know about it) quite a number of times and be wondering what actually is Back4App is. So, long description short:
“Back4App is the new Parse”
Purpose is to explain the usage of it to you, i.e. on how to integrate it and use it.
Setting Up
Create a project and in your build.gradle (app) add the following dependency:
compile 'com.parse:parse-android:1.13.1'
Build.gradle should look something similar to this:


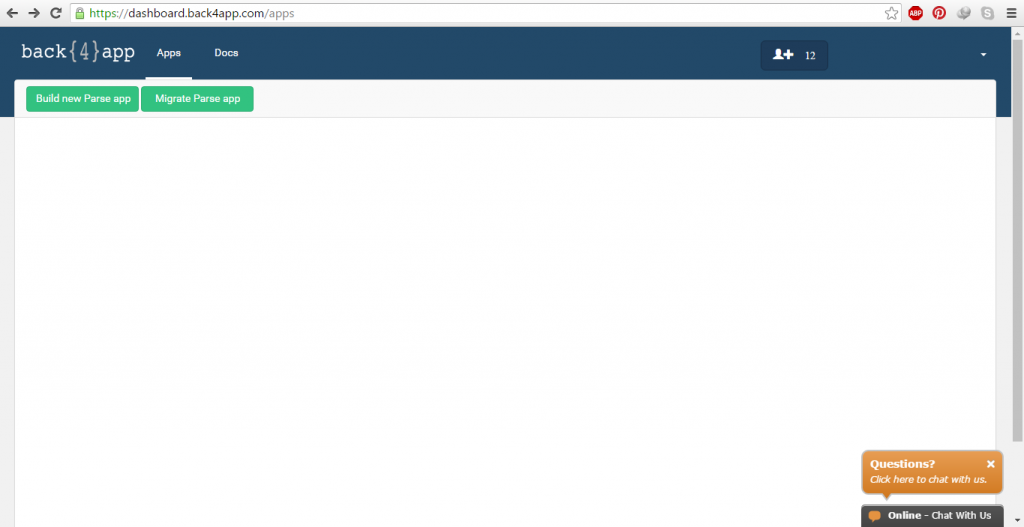
Now go to Back4App and sign up or login and click Build new Parse app.

Give your app a name and short description (optional) and click the check box if you want to keep it public then next.

As soon as you click next you’ll be directed to the page listing all the credentials and links for the app.
Click on Apps in the top left corner and you’ll be taken to a page showing your recently created app(similar to the one when logged in). Hover the mouse on the app and click View app. App’s dashboard will open, then click Parse Dashboard.

In the left pane click Create a class, and give it a name.
In your class create a column lets say “text” of type string.

Everything is setup now to push data to server. Copy client key and application id and open your project.
Initializing Parse
In onCreate of your activity do the following:
  Parse.initialize(new Parse.Configuration.Builder(this)
                .applicationId(<--Application-ID-->)
                .clientKey(<--Client-Key-->)
                .server("https://parseapi.back4app.com/").build()
        );
I have created a very simple layout. Consisting of three buttons and two edit text.

Adding to Parse
Create an object of class ParseObject in your onCreate and initialize it by passing the name of the class as an string argument create on Parse. For adding to Parse:
//Name of the column that you created in the class needs to be passed in the put method and pass the
//string your want to pass in setText
//In saveInBackground callback you'll get the response if data gets saved or failed due to some reason.
//Util is just a helper class, so don't freak out
ParseObject parseObject = new ParseObject("Back4AppAndroid");
parseObject.put("text", setText);
 parseObject.saveInBackground(new SaveCallback() {
   @Override
    public void done(ParseException e) {
           if (e == null)
      Util.showToast("Saved on server Successfully",getApplicationContext());
        else
        Util.showToast(e.getMessage().toString(),getApplicationContext());
                    }
                });
Updating data on Parse
In order to update, ParseQuery is the class that gets the job done for us. Create a query object and initialize it with your Parse class name. Since we want to update, we need to find the string in the text column. we can use whereEqualTo method of ParseQuery class and pass in the string we need to find, get the object with getFirst method and call the put method on it with the new string.
//Create a query object with your class name
// with whereEqualTo method find the text you want to update
// get the firstObject you find and update the text with your new string

 ParseQuery query = ParseQuery.getQuery("Back4AppAndroid");
 query.whereEqualTo("text", find);
 ParseObject parseObject = query.getFirst();
 parseObject.put("text",setText);

 parseObject.saveInBackground(new SaveCallback() {
 @Override
 public void done(ParseException e) {
   if (e == null)
   Util.showToast("Saved on server Successfully",getApplicationContext());
   else
   Util.showToast(e.getMessage().toString(),getApplicationContext());
                            }
    });
Deleting data from Parse
Deleting is quite similar to updating. All we need to do is call a different method of ParseObject class, and also put method is not used.
 ParseQuery query = ParseQuery.getQuery("Back4AppAndroid");
 query.whereEqualTo("text", find);
 ParseObject parseObject = query.getFirst();

 parseObject.deleteInBackground(new DeleteCallback() {
 @Override
 public void done(ParseException e) {
  if (e == null)
  Util.showToast("Saved on server Successfully",getApplicationContext());
  else
  Util.showToast(e.getMessage().toString(),getApplicationContext());
     }
    });
Bind the code to the onClickListeners of all the three buttons I showed in the picture and edit text then run your app and check if it works.
I have pushed the sample app to my Github account.
Hope this helps. 🙂


Recent Posts
Things to know when moving to Germany
This article covers some important things you must know when you are considering a move…
Unit Testing in Android for Dummies
What is Unit Testing? In its simplest term, unit testing is testing a small piece…
Factory Design Pattern
In this article, you will learn about a type of Creational Design Pattern which is…
Creating Target specific Theme in iOS
In this tutorial, you will go through the use of targets to achieve two separate…
Facade Design Pattern
In this article, you will learn about a type of Structural Design Pattern which is…
Singleton Design Pattern
In this article you will learn about a type of Creational Design Pattern which is…
View Comments
How to get all data of user from back4server ?